
Design process
Sketch to Render with AI: Turn Interior Sketches into Design Concepts
Follow a perspective sketch through a green-and-walnut concept and a focused revision, with prompts and a practical review checklist.
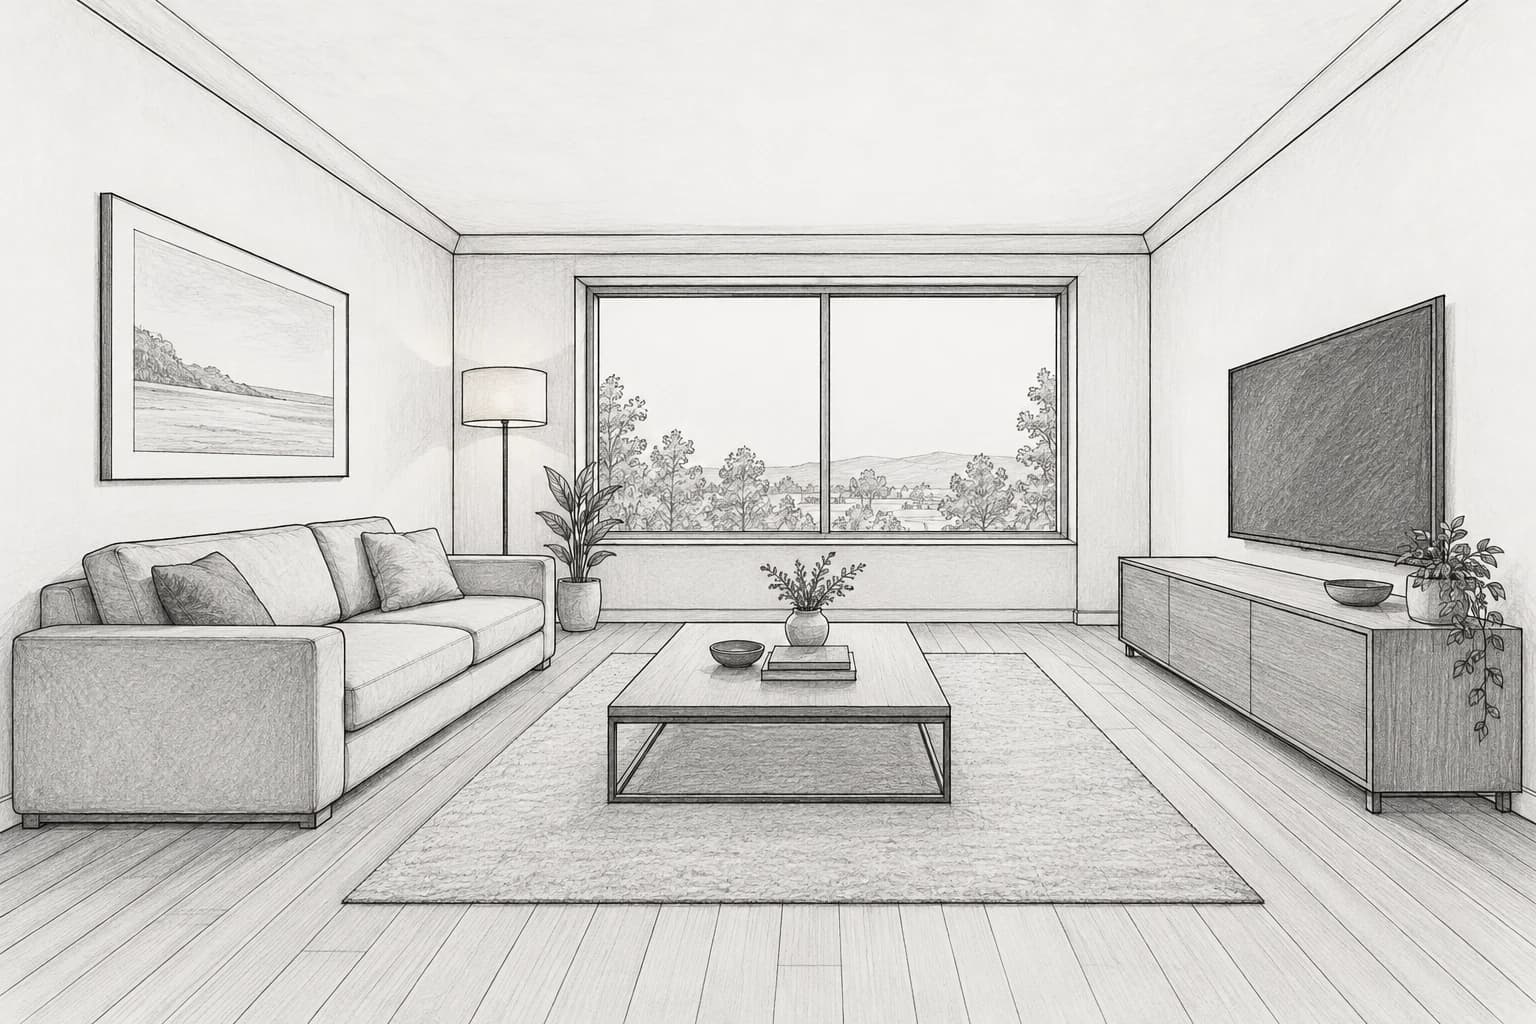
A line sketch can explain an arrangement while leaving the atmosphere difficult to imagine. Sketch-to-render AI adds a visual interpretation of materials and light, helping you discuss the direction before every finish is resolved. The useful result is an image you can compare with the drawing and refine deliberately.
This example follows one perspective sketch through a first material concept and a cooler rug revision. The sequence shows what the model adds, what to check against the source and when to move from images to real samples or measured design.
Choose a perspective sketch with clear boundaries
A useful sketch explains where the walls, window and main furniture are. It does not need polished shading, but the sofa should not merge into the wall line and the window should have a readable outline. A perspective view gives the model a visible room to interpret. A measured floor plan serves a different purpose and does not automatically determine a reliable perspective image.
Our starting image is an original AI-generated line sketch: a sofa on the left, a rectangular table in the center, a media cabinet on the right and a large rear window. The sequence is a worked concept example rather than a client project. Keeping that simple arrangement makes it easier to see what the rendering adds.
If you are photographing a paper sketch, keep the page flat and the camera square to it. Use even light and crop away unrelated notes or drawings. For a model view, export a clean perspective with the important edges visible. Avoid presenting multiple camera views in one image when you want one consistent result.
Describe the materials the sketch leaves open
The sketch already contains an arrangement. Your text should explain the material and lighting decisions that the lines do not resolve. In this example, the brief calls for a forest green sofa, walnut furniture, soft off-white walls, oak flooring and a rust rug. That gives each large surface a clear role without asking the model to redesign the room.
Name the anchors you want retained: the window outline, furniture positions and camera. Then state the changes as materials and light. Avoid adding instructions to enlarge the window, introduce new furniture or create a luxury room unless those are genuinely part of your design question. Broad atmosphere words can invite changes beyond the sketch.
Use a short hierarchy when several things matter. The room arrangement comes first, then the main palette, then the lighting. A very long list of decorative details can distract from a sofa shape or opening that matters more to the project.
Read the first render against the sketch
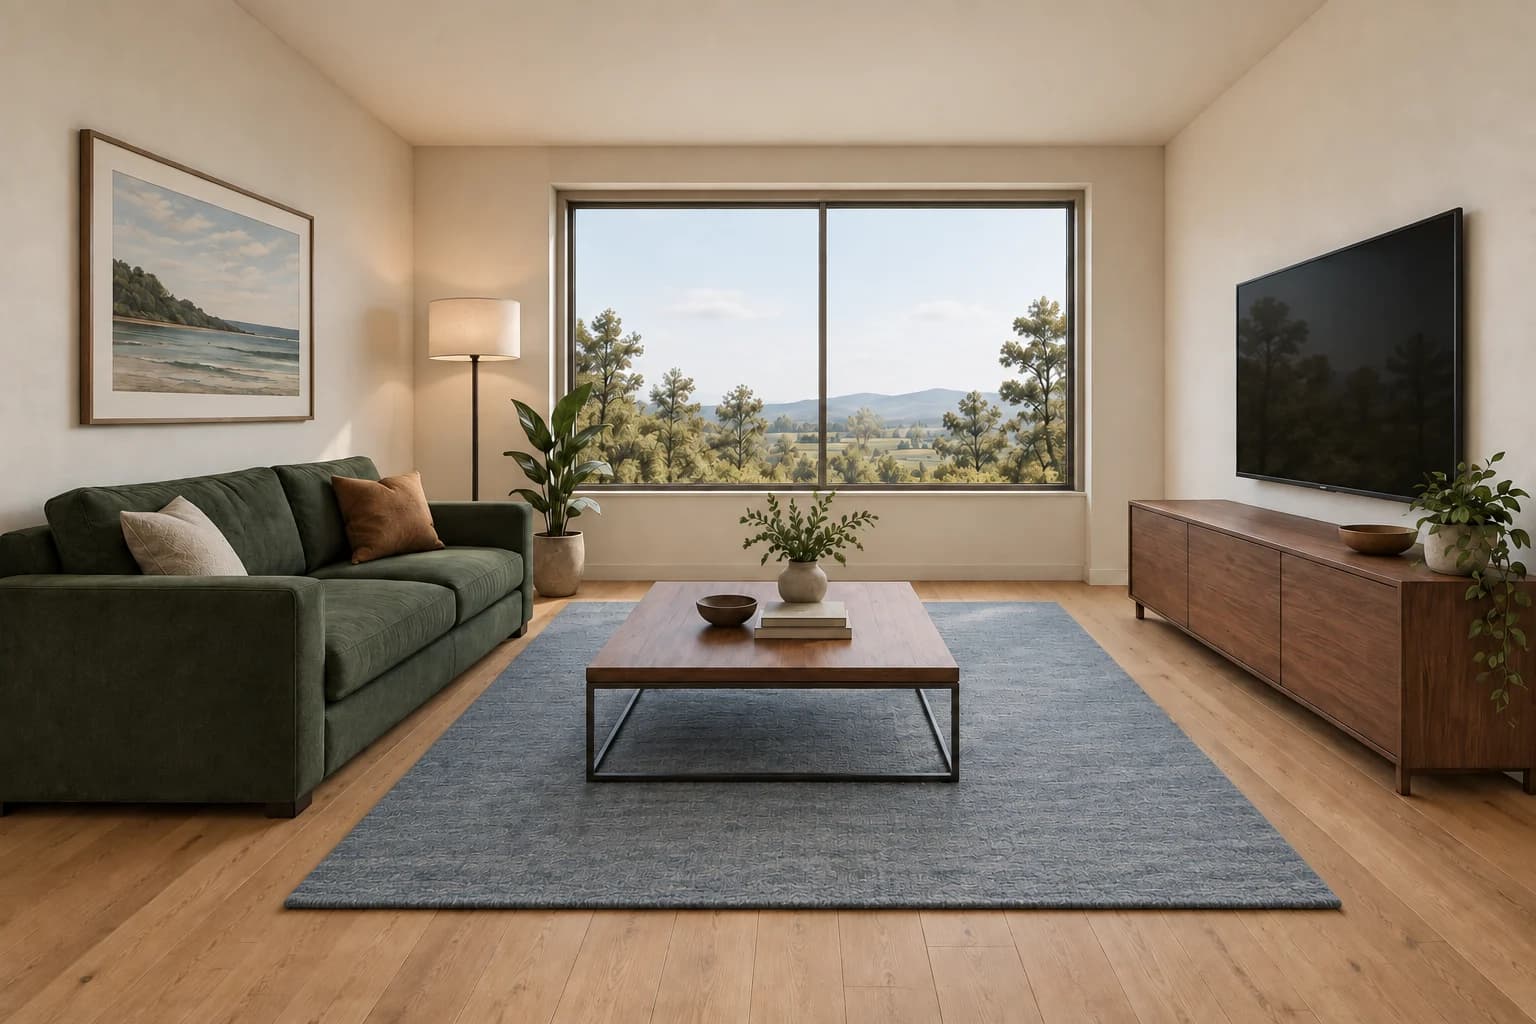
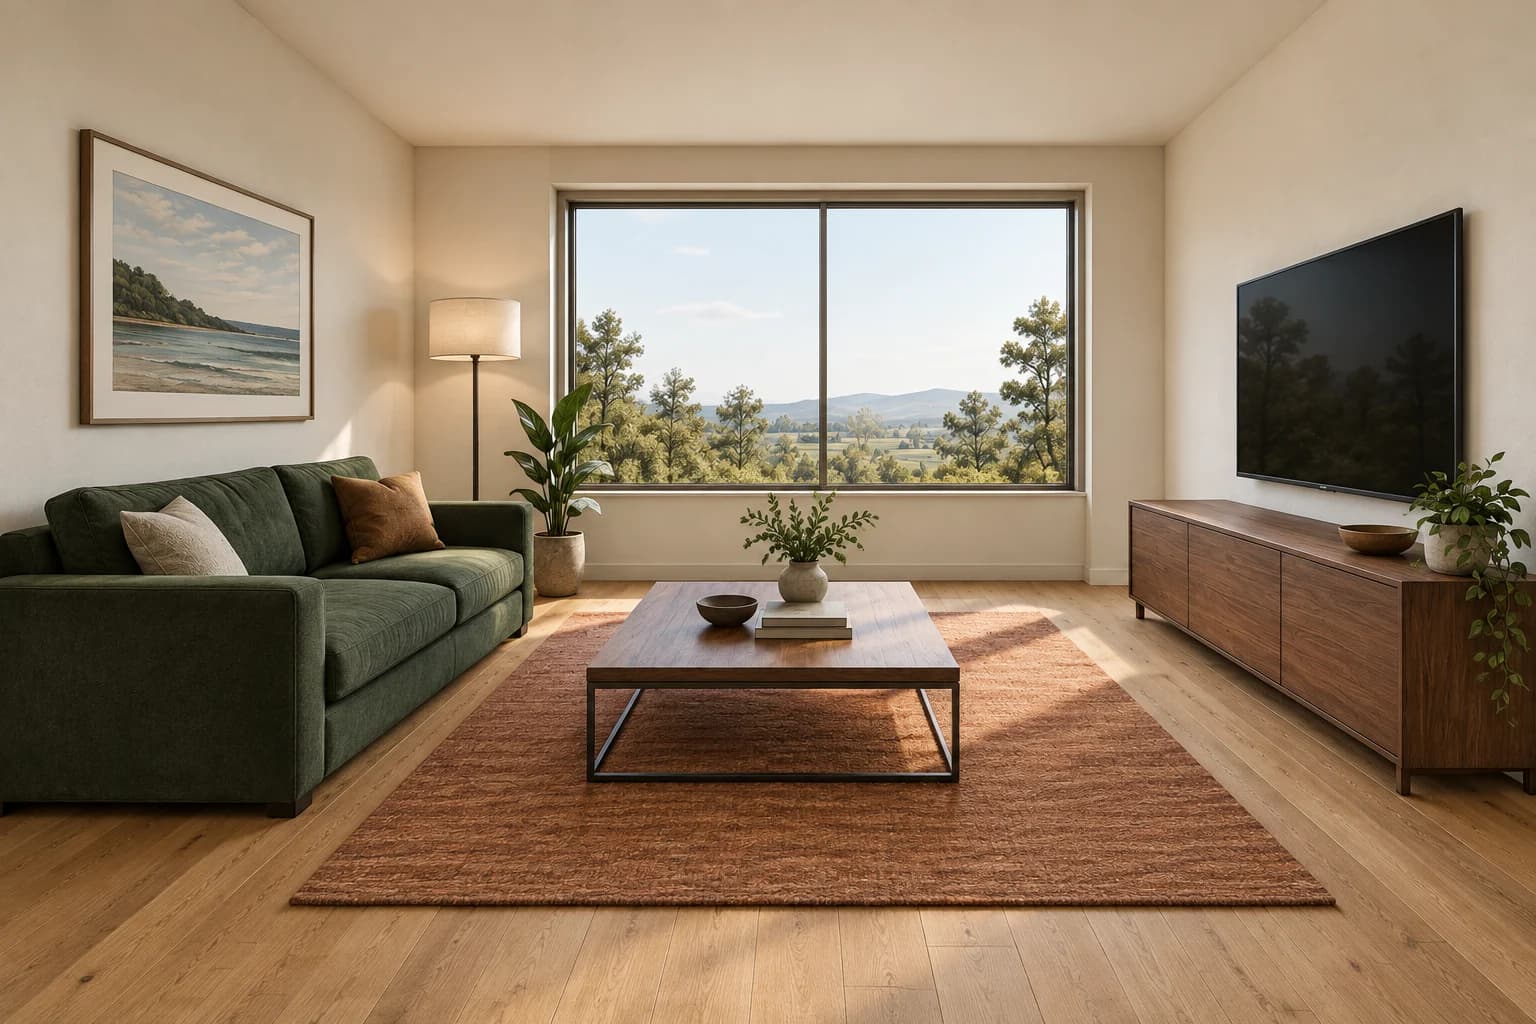
The first concept gives the line drawing a material hierarchy. The green sofa anchors the left side, walnut connects the table and cabinet, and the rust rug adds warmth across the center. The arrangement remains recognizable, which makes the result useful for discussing the palette.
It also interprets details the sketch leaves open: wood grain, upholstery texture, reflections and the sketched outdoor view. The sunlight is more direct than the soft daylight requested, and the framing moves closer, cropping the left side of the sofa. Treat those as interpretations. A realistic surface does not mean the model has identified a product, measured a room or calculated its daylight.
Review the window and major furniture silhouettes before the attractive details. If a structural outline has changed, decide whether to reject the image or correct the source. If the arrangement is useful and only the mood needs work, move to a focused revision. This avoids repeatedly rebuilding a concept that is already close to the design question.
Refine one material relationship and the light
For the second version, we keep the green sofa and walnut furniture but ask for a dusty blue rug and more diffuse daylight. The material change tests a cooler relationship at floor level. The lighting request addresses a specific difference between the first prompt and its output rather than introducing a new style.
The revised image retains the broad arrangement and changes the rug from rust to blue. The floor shadows are less pronounced, making it easier to discuss the palette without the dramatic sunlight dominating the image. Compare the sofa, table and window again; a successful requested change does not remove the need to check everything you meant to keep.
Save the first concept alongside the revision. The rust version may still be useful if you later decide the blue feels too cool. A clear pair of versions is more informative than a folder in which every image is called final. Name them by the actual decision, such as rust rug with direct light and blue rug with softer light.
Use a detail study to discuss texture
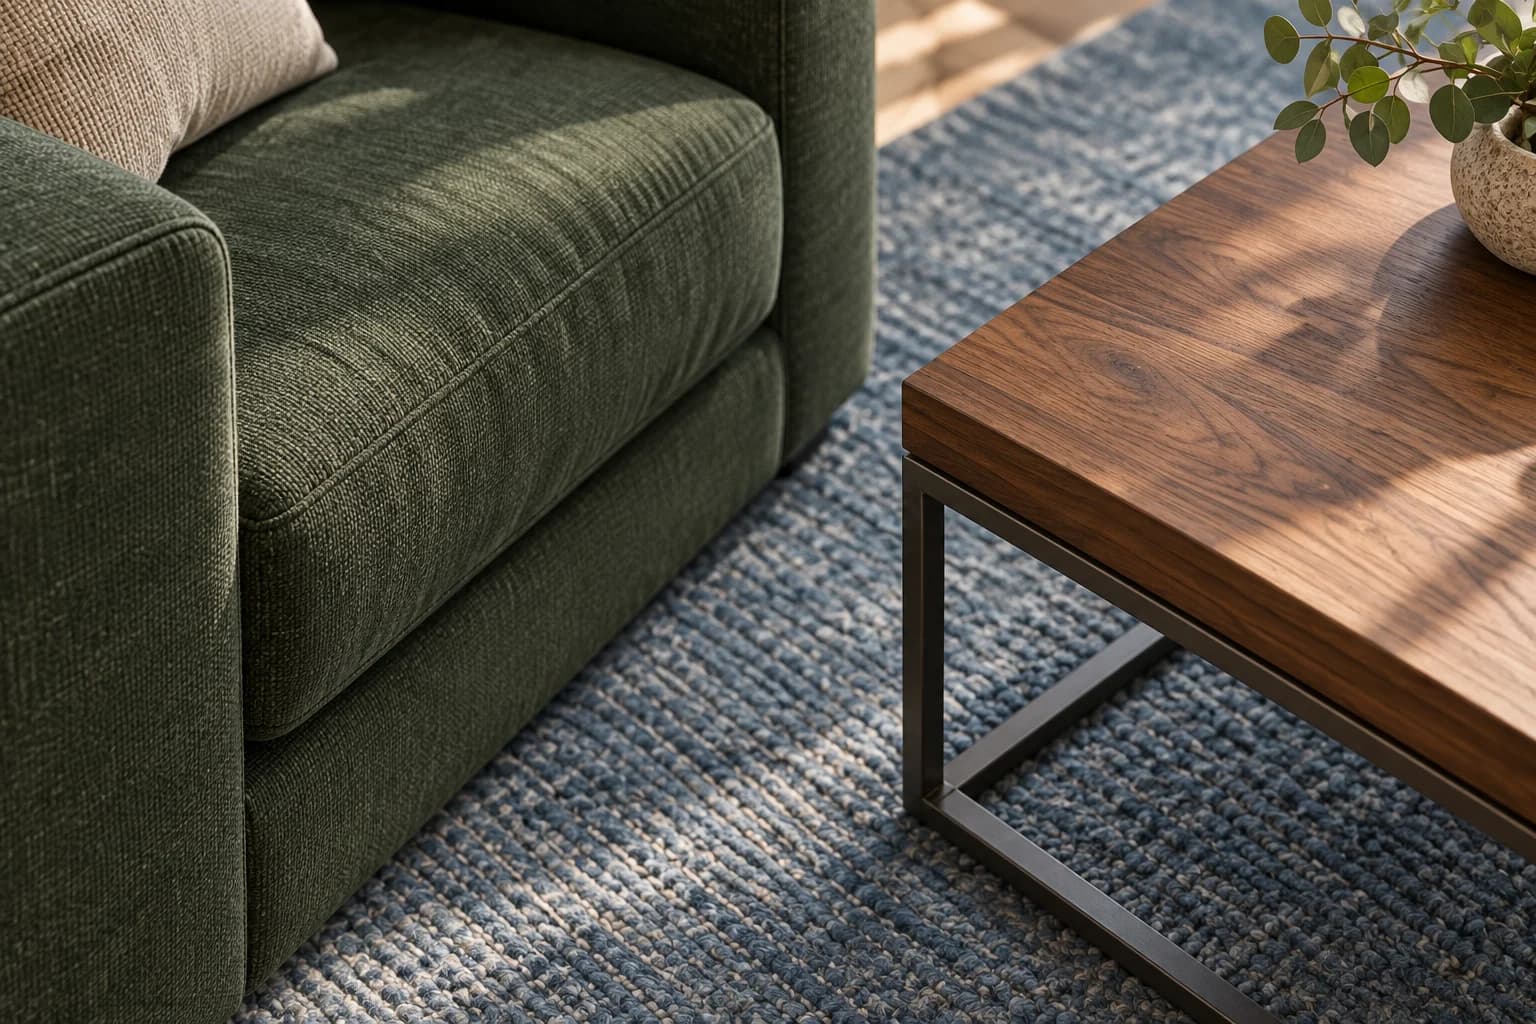
Once the palette is useful, a material detail can help you discuss the green upholstery beside the walnut table and blue rug. Those textures have different visual weight. The close-up below explores that relationship without adding another whole-room direction.
Keep the purpose explicit: this is an illustrative material study based on the refined concept. It does not verify the weave of an available fabric, the construction of the table or the exact edge of the rug. Use it to describe the character you want, then find samples and products that support the design.
Return to the full-room view after reviewing the detail. A texture that is interesting close up may be almost invisible from the doorway, while a highly varied wood grain can become more prominent across a long cabinet. The two scales answer different questions.
Decide what the result is ready to communicate
A sketch render can communicate mood, material relationships and a proposed direction. It can support a conversation about whether the green sofa feels right or whether the room needs a warmer rug. It is less useful when the discussion depends on an exact clearance or a product-specific construction detail.
Before sharing, put the sketch, first concept and selected revision in order. Add one sentence to each explaining its role. This shows how the visual idea developed and helps another person distinguish a retained design decision from a model interpretation. It also keeps the original intent visible when the final image looks persuasive.
For a project that will be built, connect the selected direction back to measured drawings, actual furniture dimensions and material samples. If the concept suggests a change to the window or furniture arrangement, update and verify the underlying design deliberately. Do not let an incidental image change become an undocumented project decision.
| Layer | Useful visual question | Next verification |
|---|---|---|
| Geometry | Window outline, room boundaries and furniture positions | Compare with the sketch and measured design |
| Materials | Green fabric, walnut, floor and rug relationship | Find real samples and available finishes |
| Lighting | Mood and shadow character | Verify actual lighting separately |
| Detail | Texture and visual contrast | Resolve products and junctions in the design |
When to fix the sketch instead of the prompt
If the same ambiguous object is repeatedly misread, make its outline clearer in the source. A darker line separating a sofa arm from the wall can be more useful than another paragraph describing the sofa. Similarly, a missing window division is better shown in the drawing when that division is essential.
If the arrangement is clear but the materials are wrong, revise the text. Use specific relationships: darker walnut than the floor, muted blue rather than bright cobalt, matte fabric rather than shiny upholstery. Keep the accepted parts named so the next request does not reopen the entire palette.
Stop once the image answers the current question. If the next decision requires a furniture dimension or a sample, another rendering may add polish without adding useful information. Move to the source that can answer that question, retaining the image as the visual reference.
Questions about sketch-to-render AI
Does the sketch need to be professionally drawn?
No, but its important boundaries need to be readable. A clear simple perspective can be more useful than a detailed drawing with ambiguous furniture or overlapping alternatives.
Can I use an exported model view?
A clean perspective view can provide a useful starting image. Keep the camera and visible boundaries clear, then describe the materials you want to explore. The resulting image remains a concept rather than a verified model render.
Will AI preserve every line?
No. Compare the output with the source and check the features that matter. If exact geometry is required, retain the measured drawing or model as the authority.
Can I specify products from the render?
Use it to describe a material direction. Verify actual products, dimensions and finishes separately; a convincing image does not identify what can be ordered.